Your WiFi works well inside the house, but the connection disappears when you walk toward the garage, barn, driveway, or outdoor security cameras. Moving the router closer to a window might help a little, yet the signal still drops before reaching the places where you need it.
Choosing a wifi extender for large property coverage starts with understanding how far the signal must travel and what stands in its way. A nearby patio may only need an outdoor access point. A detached workshop might need a wired connection. For a barn across an open field, a point-to-point wireless bridge is often a better solution than an ordinary plug-in extender.
This guide explains how to assess your property, choose suitable equipment, find the best mounting position, and test the connection. You'll also learn how to avoid common installation mistakes, particularly when extending WiFi across acreage, connecting outdoor cameras, or getting reliable internet inside metal buildings.
Understanding Coverage Needs for Large Properties

WiFi coverage across a large property is not the same as improving the signal in an upstairs bedroom.
Inside a house, the router may only need to reach through a couple of walls. Outside, the signal may have to travel across a yard, pass through trees, and reach another building.
The distance matters, but so do the materials between the router and the destination.
A phone may show a WiFi connection near the garage while struggling to load a webpage. An outdoor camera might connect successfully in the morning but lose its connection later.
These problems often happen because the receiving device can detect the network but cannot maintain a dependable connection back to the router.
Before purchasing an extender, identify the locations where WiFi is needed.
Check these areas separately:
-
The patio or backyard seating area.
-
The driveway and front gate.
-
Detached garages and workshops.
-
Barns and storage buildings.
-
Outdoor security camera mounting points.
-
Garden offices or guest buildings.
-
Other locations where phones, laptops, or smart devices will connect.
You may find that one section of the property needs only a stronger outdoor signal, while another requires its own access point.
Distance and Obstacles Across Open Land
WiFi signals weaken as they travel farther from the transmitting device.
A router installed inside the living room must first send its signal through exterior walls before reaching the yard.
From there, trees, vehicles, fences, and buildings can weaken it further.
Open land generally provides a more favorable wireless path than a route blocked by several buildings. However, an open field does not guarantee reliable coverage at unlimited distances.
The device receiving the signal matters just as much as the router sending it.
For example, a purpose-built wireless bridge with directional antennas may communicate across a much greater distance than an ordinary smartphone.
A phone has relatively small antennas and limited transmitting power. Even if it detects a distant network, it may not be able to send data back reliably.
This is why advertised WiFi coverage figures can be misleading when applied to large properties.
A device may be capable of maintaining a specialized outdoor link under favorable conditions without providing usable WiFi to ordinary phones over the same distance.
To understand your existing coverage, walk toward the destination with a connected phone.
Check the connection at several points:
-
Just outside the house.
-
Halfway toward the destination.
-
Near the entrance to the garage or barn.
-
Inside the building.
-
At the exact location where a camera or computer will be used.
Open a familiar website at each location.
If possible, also run a speed test.
Don't rely entirely on the number of WiFi bars displayed on your phone. A device can show a connected network while experiencing slow speeds or repeated connection failures.
If WiFi disappears halfway across the yard, placing an ordinary repeater inside the distant barn is unlikely to help.
The repeater would have no dependable signal to extend.
Signal Interference from Weather and Metal Structures
Metal buildings are among the most challenging locations for residential WiFi coverage.
Steel siding, metal roofs, and large metal doors can reflect or weaken wireless signals.
You might have a good connection while standing outside a barn, then lose it immediately after walking through the doorway.
That does not necessarily mean the router is defective.
The building materials are preventing the signal from entering effectively.
In this situation, repeatedly upgrading the house router may not solve the problem. Bringing a network connection to the barn and installing an access point inside is usually more practical.
Trees create a different challenge.
Leaves and branches contain water, which can weaken wireless signals. Dense foliage is particularly troublesome when it sits directly between two outdoor antennas.
A connection that works well in winter may become less reliable after trees regain their leaves.
Weather also affects outdoor connections, although the impact varies.
For ordinary 2.4 GHz and 5 GHz WiFi, dense wet foliage and physical obstructions are often more significant than typical rainfall.
Stronger weather-related attenuation can occur with higher-frequency wireless systems.
Before choosing equipment, inspect the entire path between buildings.
Look for:
-
Large trees directly between the house and barn.
-
Metal roofing or siding.
-
Storage containers.
-
Concrete walls.
-
Hills or changes in ground elevation.
-
Farm machinery parked along the signal path.
-
Areas where vegetation grows heavily during summer.
These observations will help determine whether an extender, outdoor access point, or dedicated wireless bridge is appropriate.
WiFi Extender for Large Property: Choosing the Right Setup
Not every device marketed as a WiFi extender performs the same job.
A plug-in repeater rebroadcasts an existing wireless connection.
An outdoor access point creates WiFi coverage closer to the devices that need it.
A point-to-point wireless bridge connects two locations through a dedicated wireless link.
A wired access point receives its connection through Ethernet or another suitable wired network.
Understanding those differences can save you from purchasing equipment that cannot reach your destination.
Standard WiFi Repeater for Nearby Coverage Gaps
A standard WiFi repeater is useful when the original network still reaches part of the area you want to cover.
For example, your router might provide a reasonable signal in an attached garage but poor reception near the far wall.
Installing a compatible extender where the signal remains dependable may improve coverage.
The important detail is placement.
An extender should be installed where it can still receive a useful signal from the main router, not where the signal has already disappeared.
If the extender receives a weak connection, it may create a visible WiFi network without providing reliable internet.
This often explains why phones show strong signal bars but websites load slowly.
For nearby indoor coverage gaps, a dual-band extender can be practical.
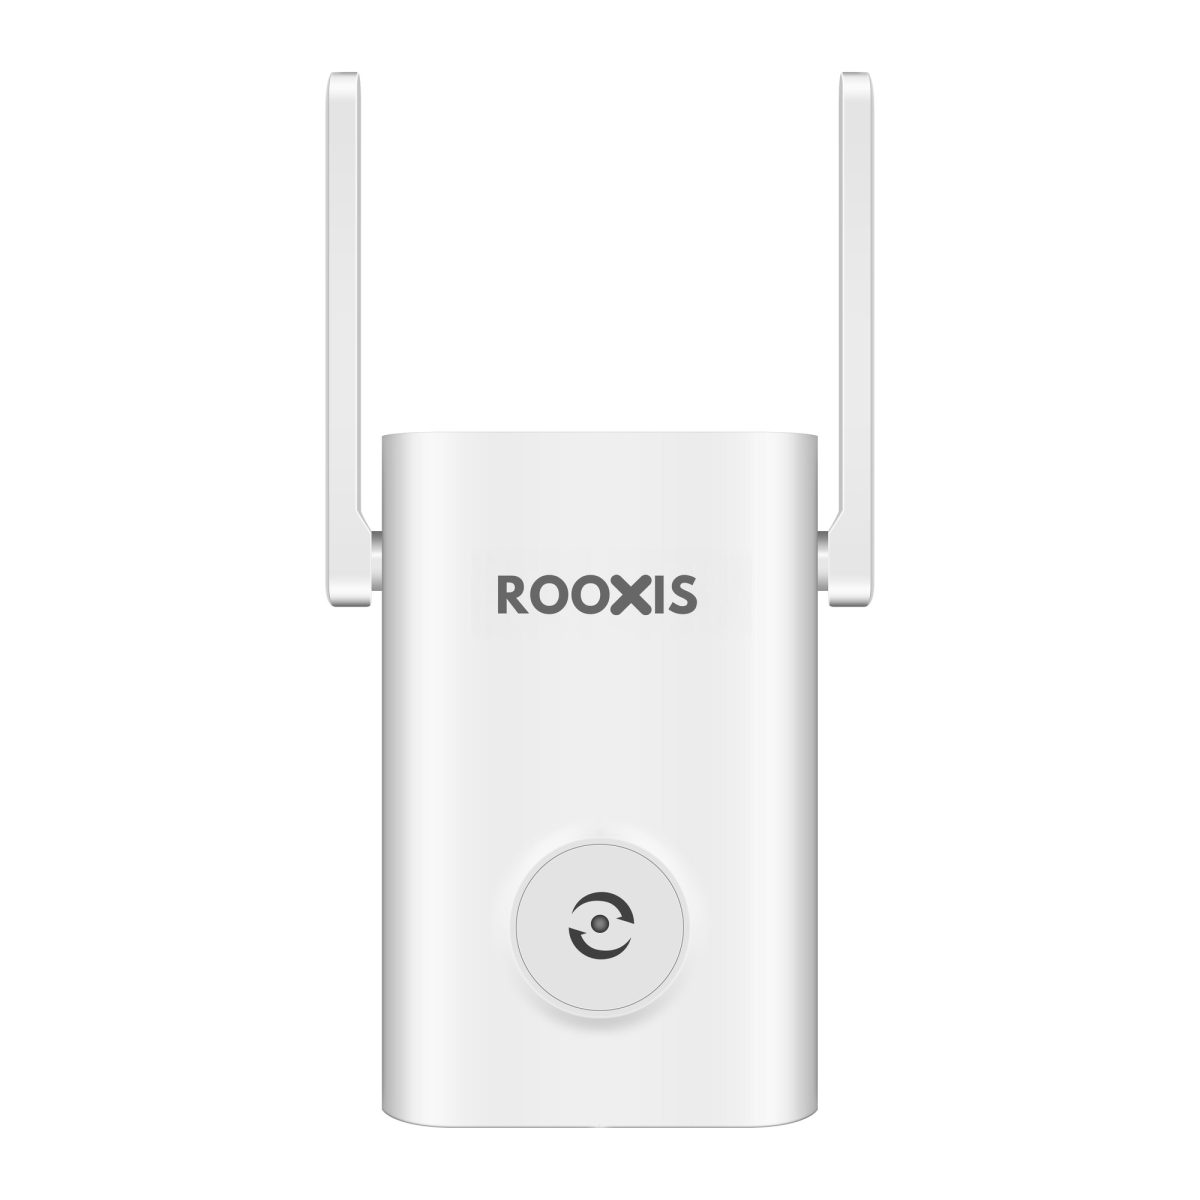
The ROOXIS AC1200 WiFi extender, for example, supports both 2.4 GHz and 5 GHz networks and offers repeater and access point modes.
That type of device is better suited to extending coverage within or near a building than serving as an exposed outdoor bridge across a large field.
If the problem mainly involves several rooms inside a spacious home, see the guide to the best WiFi extender for a large house.
Best suited for: Attached garages, nearby indoor rooms, and covered areas where the main router still provides a usable connection.
Main limitation: A repeater cannot reliably extend a connection it cannot receive.
Outdoor WiFi Access Point for Yard and Garden Coverage
An outdoor access point is a better starting point when you need WiFi around the house rather than inside it.
Consider a property with two security cameras near the driveway and another overlooking the backyard.
The indoor router may struggle because its signal must pass through the exterior wall before reaching those cameras.
An outdoor-rated access point mounted on the appropriate side of the house can provide coverage closer to them.
Many outdoor access points connect to the router through Ethernet.
This is useful because the connection from the access point back to the router does not depend on weak WiFi.
That connection is called Ethernet backhaul.
The access point receives network data through the cable and provides WiFi to nearby devices.
For example, a suitable outdoor access point mounted near the back of a house may serve a patio, garden seating area, and nearby cameras.
However, it may not provide a dependable connection to a barn much farther away.
Best suited for: Patios, yards, nearby outdoor cameras, and garden areas.
Main limitation: Coverage still depends on distance, antenna characteristics, obstacles, and the receiving devices.
Point-to-Point Wireless Bridge for Detached Buildings
A wireless bridge is often the better choice when internet access must reach a detached building across open land.
Instead of trying to cover the entire distance with ordinary WiFi, the system creates a dedicated wireless connection between two locations.
A typical arrangement uses two compatible bridge units.
One connects to the main network at the house.
The other is installed at the barn or workshop.
The units communicate with each other through a directional wireless link.
Inside the destination building, you can connect a separate access point to provide ordinary WiFi.
This distinction is important.
The bridge carries the network between buildings. The access point provides WiFi to devices inside the destination building.
For example, a homeowner may want internet access in a workshop located across a field.
A directional bridge can connect the workshop to the house when the equipment, distance, and signal path are suitable.
A local access point then provides WiFi for phones, laptops, and security cameras inside the workshop.
This avoids expecting a phone to maintain a direct connection to the house router across the property.
Best suited for: Detached barns, workshops, garages, and other buildings with a suitable wireless path.
Main limitation: The installation requires appropriate equipment, antenna alignment, power, and adequate clearance.
Wired Access Point for Permanent Buildings
If you can install a suitable network cable between buildings, a wired connection may provide greater consistency than a long wireless link.
A permanent workshop or detached office is a good example.
Instead of relying on an outdoor wireless bridge, the building receives a network connection through properly installed cabling.
An access point inside the building then provides local WiFi.
Fiber-optic cabling is worth considering for connections between separate buildings.
Fiber carries data without creating the same conductive electrical connection between structures as copper Ethernet.
This matters because electrical potential differences and lightning-related surges can create problems with improperly installed copper connections between buildings.
Do not run ordinary indoor Ethernet cable across the yard or between separate buildings without proper installation planning.
For a permanent connection, ask a qualified installer about suitable cable types, conduit, grounding, surge protection, and applicable electrical codes.
Best suited for: Permanent garages, workshops, offices, and other buildings where installing a cable route is practical.
Main limitation: Installation can require trenching, conduit, professional assistance, and more planning.
Which Setup Fits Your Property?
| Property situation | Recommended starting point | Main advantage | Main limitation |
|---|---|---|---|
| Weak WiFi in an attached garage | Indoor extender or wired access point | Relatively simple installation | Walls may weaken a repeater's connection |
| Patio or garden near the house | Outdoor-rated access point | Brings WiFi closer to outdoor devices | Requires suitable mounting and power |
| Outdoor cameras around the house | Outdoor access point | Can serve several nearby cameras | Coverage depends on camera placement |
| Nearby shed with usable WiFi | Suitable repeater or outdoor access point | May avoid building-to-building cabling | Wireless backhaul can be unstable |
| Barn across an open field | Point-to-point bridge and local access point | Dedicated connection between buildings | Needs alignment and clear signal path |
| Permanent outbuilding with available conduit | Fiber backhaul and local access point | Reliable connection between structures | More involved installation |
For a small coverage gap, start with the simplest suitable equipment.
For a distant building, plan how the network will reach the building before deciding where to provide WiFi inside it.
Key Features for Outdoor and Long Range Extenders
Outdoor networking equipment must handle a different environment from an indoor router.
A device mounted outside may experience rain, dust, sunlight, wind, and changing temperatures.
It also needs suitable antennas, a reliable power supply, and a stable connection back to the main network.
These specifications matter more than broad promises about covering several acres.
Weatherproofing Ratings and Durability
Outdoor access points and wireless bridges should have enclosures designed for the environment where they will be installed.
One common specification is IP65 weatherproofing.
IP ratings describe how an enclosure resists dust and water intrusion under defined test conditions.
For an IP65-rated enclosure:
-
The first digit, 6, indicates dust-tight protection.
-
The second digit, 5, indicates resistance to water jets.
An IP65 rating does not mean the device can be submerged.
It also does not automatically establish suitability for extreme temperatures, severe wind, or every mounting location.
Check the manufacturer's operating temperature range and installation instructions.
Cable connections also deserve attention.
A weather-resistant access point may still develop problems if an Ethernet connector is left exposed to moisture.
Use the supplied seals and cable glands.
Route cables so rainwater does not collect at connectors.
Avoid placing equipment where standing water, roof runoff, or falling objects can damage it.
For equipment mounted on a barn or exposed pole, check that the bracket and mounting surface can withstand normal wind conditions.
Selecting 2.4 GHz vs 5 GHz Bands for Range
The 2.4 GHz frequency band and 5 GHz frequency band behave differently.
Neither is automatically the right choice for every large property.
2.4 GHz generally provides better reach and obstacle penetration under comparable conditions.
It can be useful for outdoor security cameras, smart sensors, and devices near the edge of a coverage area.
However, the 2.4 GHz band can be crowded.
Neighboring networks and other wireless devices may create interference.
5 GHz generally offers more capacity and can provide faster connections over suitable distances.
It is useful for laptops, video calls, and compatible outdoor bridge equipment.
The tradeoff is that 5 GHz signals usually weaken more quickly through walls, vegetation, and other obstacles.
For example, a camera located near the far end of a garden may work more reliably on a well-positioned 2.4 GHz network.
A laptop inside a workshop might benefit from 5 GHz when an access point is installed in the same building.
For long-range outdoor bridges, the antenna system and link design are more important than simply choosing the lower frequency.
Follow the equipment manufacturer's recommendations for the intended distance and application.
Does WiFi 6 Improve Long-Range Coverage?
WiFi 6 can improve network efficiency, especially when several compatible devices share the same wireless network.
That does not mean a WiFi 6 router automatically provides more outdoor range.
For example, replacing a WiFi 5 router with a WiFi 6 model will not remove the shielding effect of a metal barn.
Likewise, a newer router placed behind several walls may still struggle to reach a camera across the yard.
WiFi 6 may be useful when a workshop contains multiple laptops, phones, and other devices that need reliable local coverage.
However, the connection between the workshop and the house still needs to be designed properly.
For large properties, prioritize these factors:
-
A suitable network connection to the destination.
-
Appropriate antenna placement.
-
Clear wireless paths.
-
Reliable power.
-
Compatible devices.
-
Enough network capacity for the intended activities.
If the main problem is distance, solve the distance problem first.
High-Gain Directional Antennas
Outdoor networking equipment may use omnidirectional or directional antennas.
An omnidirectional antenna distributes coverage around the access point.
This makes it useful when devices are spread across a yard or garden.
A directional antenna concentrates more of its radio energy toward a particular direction.
This is useful when connecting a house to a barn or workshop.
High-gain directional antennas can improve a correctly designed outdoor link, but alignment is important.
Imagine installing a directional bridge unit on the garage wall.
If it is aimed toward the wrong section of the barn, signal quality may be poor even though the two buildings are relatively close.
The antenna should be aimed according to the manufacturer's instructions.
After installation, use the equipment's signal indicators or management interface to make small adjustments.
A strong, stable link is more useful than simply getting the two devices to connect once.
Power Over Ethernet and Ethernet Backhaul
Power over Ethernet, or PoE, allows compatible network devices to receive electrical power and data through an Ethernet cable.
This is particularly useful outdoors.
An access point mounted near the roofline may not have an electrical outlet nearby.
With suitable PoE equipment, the device can receive power through a cable connected to a compatible PoE switch or injector.
A typical installation includes:
-
The main router or network switch.
-
A compatible PoE power source.
-
Suitable Ethernet cabling.
-
An outdoor-rated access point or bridge device.
Check the power specification carefully.
Some devices support standards such as IEEE 802.3af or 802.3at.
Other equipment may use manufacturer-specific or passive PoE arrangements.
They are not automatically interchangeable.
Using the wrong power equipment can cause the device to malfunction or become damaged.
Follow the manufacturer's cabling, weatherproofing, grounding, and surge protection instructions.
For a cable connection between separate buildings, consult a qualified installer about the appropriate method.
Optimal Placement Strategies for Outbuildings and Barns

Long range WiFi extender placement is largely about finding a good wireless path.
The highest possible mounting point is not always the best one.
A suitable location should provide adequate clearance, a stable mounting surface, safe cable routing, and access for future maintenance.
For a wireless bridge, both ends matter.
A well-positioned transmitter at the house will not overcome a receiver installed behind a metal roof or thick tree branches.
Maintaining Direct Line of Sight
Line of sight means the transmitting and receiving antennas have a clear path between them.
For a building-to-building wireless bridge, begin by identifying a position where the two endpoints can face each other.
Stand near the proposed mounting point at the house and look toward the barn.
If a tree, another building, or a roof edge blocks the view, consider a different location.
Visual line of sight is a useful starting point, but radio signals also need clearance around the direct path.
This surrounding space is commonly described as the Fresnel zone.
You do not need to calculate the Fresnel zone yourself for an initial property survey.
The practical lesson is to avoid installing antennas where branches, roof edges, or other large objects crowd the connection path.
A wireless link may work poorly even when the antennas appear to face each other.
Outdoor bridge manufacturers, including TP-Link, provide installation guidance covering alignment and suitable link paths.
For a permanent installation, consider how the route changes throughout the year.
A tree that barely affects the signal in winter may become a major obstruction when its branches fill with leaves.
Height and Mounting Height Guidelines
There is no universal mounting height for outdoor WiFi equipment.
The correct height depends on the terrain, distance, obstacles, and antenna design.
For a yard access point, a suitable position on an exterior wall may provide the coverage you need.
For a bridge connecting two buildings across uneven ground, a higher mounting point may be necessary.
Start with the lowest practical position that provides a suitable signal path and follows the manufacturer's recommendations.
Avoid mounting equipment unnecessarily high.
Higher installations may be harder to maintain and can increase exposure to wind and lightning-related hazards.
Use brackets designed for the equipment.
Check the stability of the wall, pole, or mounting surface.
Do not mount devices near overhead electrical lines.
If installation requires climbing onto a roof or working at a difficult height, use a qualified installer.
For indoor router positioning, the ideal height placement guide explains how furniture, walls, and placement affect coverage.
Placement for a Metal Barn
A metal barn often needs its own indoor WiFi access point.
Trying to push the house WiFi directly through the barn's steel siding may produce an unreliable connection.
A better arrangement is to bring the network to the barn first.
For example:
-
Install a suitable wireless bridge unit at the house.
-
Mount the receiving bridge unit on the barn where it has a clear path toward the house.
-
Bring the connection inside through a properly protected cable route.
-
Connect an indoor access point.
-
Position the access point where the barn's devices need coverage.
If the barn contains several rooms or large areas separated by metal partitions, one access point may not cover the entire interior.
Check the connection at the workbench, camera location, office area, and storage section.
Move or add access points based on those results.
A separate access point inside the barn usually provides a more useful connection than a strong outside signal that cannot penetrate the walls.
Placement for Outdoor Security Cameras
Outdoor security cameras need a connection at their actual mounting positions.
Testing with a phone near the garage door does not prove that a camera mounted higher under the roof will work reliably.
Before permanently mounting a camera, connect it to the intended network and check its live feed.
Pay attention to:
-
Whether the camera supports 2.4 GHz or 5 GHz WiFi.
-
The signal quality at the mounting point.
-
Nearby metal surfaces.
-
The distance to the access point.
-
The number of other cameras using the same network.
-
Whether the camera remains connected during normal use.
Many home security cameras support 2.4 GHz WiFi, so confirm compatibility before choosing the wireless settings.
Also review the security mode.
Some older cameras may not support WPA3-only networks and may require WPA2 compatibility.
Use secure settings supported by the equipment.
If cameras are spread across several sides of the property, one directional access point may not serve them all.
Separate outdoor access points may be more appropriate than trying to cover every camera from a single location.
What You Need Before Starting the Installation
Before purchasing or mounting equipment, collect a few details about your existing network.
You do not need professional networking experience to perform the initial assessment.
You should know where the router is installed, what equipment connects to it, and where the connection needs to go.
Prepare the following:
-
Your current WiFi network name and password.
-
Access to the router's settings.
-
A phone or laptop for testing.
-
A list of outdoor areas and buildings requiring coverage.
-
An approximate distance to each location.
-
Information about walls, trees, and other obstacles.
-
Available power outlets or suitable PoE equipment.
-
Manufacturer-approved mounting hardware.
-
The installation instructions for your selected equipment.
If you plan to install a wireless bridge, identify possible mounting locations at both buildings.
If you plan to run a wired connection, determine whether a suitable conduit or cable route already exists.
Check the location of your network switch or available Ethernet ports.
It may be easier to connect the new equipment to a switch near the internet service entry point than to route a cable from the exact location of the WiFi router.
Step by Step Installation and Signal Optimization
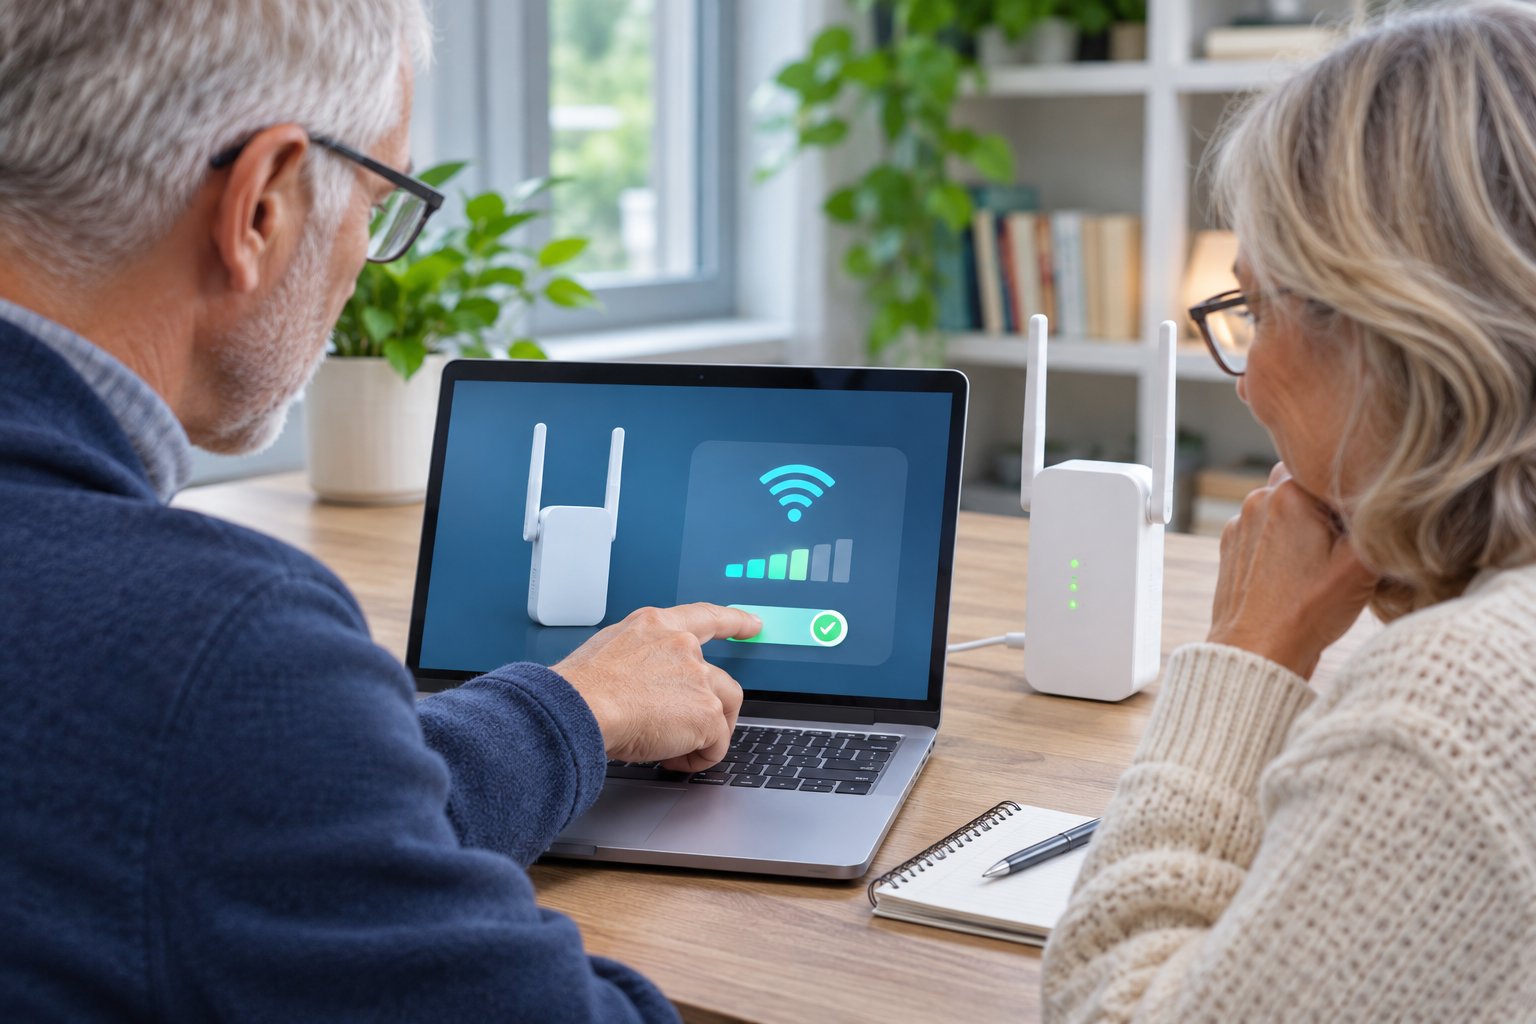
A large-property installation works best when you test each part of the connection before mounting everything permanently.
The process below applies to common outdoor access point and wireless bridge setups.
Your equipment may use different menus, indicators, or setup methods, so follow the manufacturer's instructions for those details.
Step 1: Map the Areas That Need WiFi
What to do
Walk through the property with a phone connected to your existing WiFi.
Start near the router and move toward each target location.
Check the patio, driveway, garage, workshop, and barn.
At each location, open a familiar website or run a speed test.
Also identify the devices that will use the connection.
A garden camera has different needs from a workshop where several people use laptops.
Write down where the connection becomes unreliable.
What you should see
You should be able to identify which areas already have usable WiFi and where coverage stops.
For example, the network may work on the patio but disappear halfway to the barn.
What to watch for
Do not use signal bars as your only test.
A phone may show WiFi connectivity while experiencing slow or interrupted internet access.
Step 2: Check the Main Router and Internet Connection
What to do
Stand near the main router and confirm that the internet connection works normally.
Open a few websites and test an application you regularly use.
If the connection is slow beside the router, investigate that issue before installing an extender.
Check for internet service problems, router updates, or obvious placement issues.
If the router is inside a cabinet or behind a large metal object, consider moving it to a more open position.
The ROOXIS router placement guide explains how surrounding objects and placement can affect signal coverage.
What you should see
Devices close to the router should connect reliably.
What to watch for
An outdoor access point cannot fix an unreliable internet service connection.
Solve the original connection problem before extending it across the property.
Step 3: Select the Correct Network Extension Method
What to do
Use your coverage observations to choose the appropriate equipment.
If a nearby garage still receives a reasonable signal, a suitable repeater may help.
For a garden or outdoor cameras, consider an outdoor-rated access point.
For a barn across a field, evaluate a dedicated point-to-point bridge.
For a permanent building where cabling is practical, consider a professionally installed wired connection.
Before purchasing, check the equipment's intended application.
What you should see
You should be able to explain how the network reaches the destination.
For a barn, that might be:
House router to bridge transmitter, wireless link to barn receiver, then Ethernet to a local access point.
What to watch for
Avoid buying a standard indoor extender for a location where the original WiFi signal is completely absent.
Also check whether any equipment advertised as outdoor-ready is actually rated for the intended environment.
Step 4: Test and Configure Equipment Before Mounting
What to do
Unpack the equipment and read the installation guide.
Connect the units temporarily in a safe location before mounting them outside.
For a wireless bridge, follow the manufacturer's pairing instructions.
Some matched bridge kits may arrive preconfigured. Others require manual setup.
For an access point, connect it to the network using the recommended cable and power source.
Open the manufacturer's setup app or management interface.
Confirm that the device is recognized and can establish a network connection.
Apply appropriate firmware updates according to the manufacturer's instructions.
What you should see
The equipment should power on and appear in its management interface.
Any required pairing process should complete successfully.
What to watch for
Do not assume every device uses the same setup address or PoE power requirements.
Use the instructions for your exact model.
Step 5: Choose the Outdoor Mounting Position
What to do
Identify a location that provides a clear wireless path and safe mounting conditions.
For an outdoor access point, choose the side of the building facing the area that needs coverage.
For a bridge, check the route between both endpoints.
Look for trees, rooflines, and metal structures that could obstruct the signal.
Consider how you will route the power and network cables.
What you should see
The selected position should provide a suitable view toward the target area or opposite bridge unit.
What to watch for
Avoid unstable poles, loose brackets, and locations near overhead electrical lines.
Do not choose a mounting point that cannot be accessed safely for maintenance.
Step 6: Install Power and Backhaul Safely
What to do
Install the power and network connection according to the manufacturer's requirements.
For PoE equipment, verify the required standard or compatible injector.
Use cable suitable for outdoor exposure where necessary.
Protect connectors against moisture and follow instructions for weather sealing.
Where grounding or surge protection is required, follow the manufacturer's installation guidance and applicable electrical codes.
For connections between separate buildings, ask a qualified installer to assess the route.
What you should see
The equipment should receive stable power and maintain its wired network connection.
What to watch for
Do not substitute an incompatible PoE adapter.
Avoid exposed indoor cable outdoors.
Do not improvise copper network connections between buildings without considering electrical safety.
Step 7: Connect and Align the Wireless Link
What to do
For a point-to-point bridge, aim the two units toward each other.
Open the equipment's management interface and locate its signal quality or alignment information.
Adjust one antenna slightly at a time.
Watch how the reported signal changes.
Once both units have a stable connection with suitable signal quality, secure the mounting brackets.
For a wired outdoor access point, confirm that the Ethernet backhaul is working before moving on.
What you should see
The bridge units should show a stable connection.
Signal quality should remain reasonably consistent rather than repeatedly dropping.
What to watch for
Do not stop at the first successful connection.
A poorly aligned bridge may connect but perform badly when traffic increases or conditions change.
Step 8: Configure the WiFi Network and Security
What to do
Open the access point's wireless settings.
Choose a recognizable network name and a strong password.
Select a security mode supported by the devices you intend to connect.
WPA3 is useful when compatible devices support it, but some older cameras and smart devices require WPA2.
If you use a separate network name for the barn, make it easy for family members to recognize.
You may also choose the same network name as the house when the system supports that arrangement properly.
What you should see
Phones and laptops near the access point should detect the WiFi network.
After entering the password, they should connect and access the internet.
What to watch for
Change any default administrator credentials.
Do not leave the network open without a password.
Check camera compatibility before enabling settings that older devices cannot use.
Step 9: Test From the Actual Device Locations
What to do
Take your phone or laptop to the exact places where the connection will be used.
Test inside the barn, near the garage door, at the garden office desk, and beside outdoor cameras.
Open familiar websites.
For security cameras, check whether the live feed opens and stays connected.
For a workshop, test video calls and other normal activities.
If several devices will connect at once, test them together.
What you should see
Devices should connect consistently and perform their normal tasks without repeated interruptions.
What to watch for
A strong speed test beside the access point does not prove that a camera on the opposite side of the barn has reliable coverage.
Test the actual device positions.
Step 10: Adjust Placement and Recheck After Installation
What to do
If one area still has weak coverage, make small adjustments.
You might move the access point, change antenna orientation, or improve the alignment of a wireless bridge.
Change one thing at a time.
Then repeat the same test in the same location.
This helps you determine whether the adjustment improved the connection.
Check performance during normal household activity, not only when the network is otherwise idle.
What you should see
The network should remain dependable where phones, laptops, and cameras are used regularly.
What to watch for
Do not rely on a single favorable speed test.
A connection that works for a minute but disconnects repeatedly still needs attention.
Common Mistakes When Extending WiFi Across Acreage
Outdoor WiFi problems are often caused by placement or network design rather than defective equipment.
These are the mistakes worth checking before replacing your router.
Putting an Extender Where the Original Signal Is Too Weak
A wireless repeater must receive a dependable connection from the main router.
Placing it at the edge of the property, where the original signal is barely detectable, usually produces poor results.
The extender may create its own WiFi network, but the connection back to the router remains weak.
Move it closer to the house.
If it cannot reach the intended area from a location with good backhaul, use a different network extension method.
Using an Indoor Extender Outside
Indoor extenders are not designed for continuous exposure to rain, dust, and outdoor temperatures.
Even a covered porch can expose equipment to moisture and condensation.
Use an outdoor-rated device for permanent outdoor installation.
Check the enclosure rating, operating temperature limits, and cable requirements before mounting it.
Expecting One Access Point to Cover Every Acre
An outdoor access point can improve yard coverage, but it cannot provide unlimited range.
A large property may include several coverage areas separated by buildings, trees, and terrain.
One access point mounted behind the house may work well for the patio but poorly for the front gate.
Plan coverage around the locations that need it.
Several properly positioned access points or a dedicated bridge may be more effective than one device pushed beyond its practical range.
Ignoring Metal Walls
Metal siding can severely weaken WiFi signals.
A strong network outside a barn does not guarantee usable coverage inside.
If a reliable link reaches the barn, install a local access point inside.
This is usually more practical than repeatedly trying to increase the signal transmitted from the house.
Using Too Many Wireless Repeaters in a Chain
Connecting several wireless repeaters one after another can reduce available throughput and increase delay.
Each wireless hop must carry traffic back toward the main router.
For a distant garage or barn, consider a dedicated wireless bridge or appropriate wired backhaul.
Those options provide a more direct connection.
Choosing Equipment Only by Advertised Range
Coverage figures often assume particular conditions.
They may refer to favorable outdoor environments or specialized equipment at both ends.
A wireless bridge capable of a long-distance connection does not mean an ordinary phone can connect over that same distance.
Check the type of devices being connected and the manufacturer's intended application.
A stable network covering the areas you actually use is more valuable than a large theoretical range figure.
Skipping Outdoor Cable Protection
Outdoor network installations need suitable cables and protected connections.
Improperly sealed Ethernet connectors may allow moisture to enter.
Unprotected outdoor cables can also create reliability and safety problems.
Follow the equipment manufacturer's requirements for weather sealing, cable type, grounding, and surge protection.
Use qualified assistance where the installation involves separate buildings or elevated electrical infrastructure.
What to Do If Your Outdoor WiFi Still Does Not Work
If the new network is unreliable, test the connection in stages.
Start at the main router and move toward the affected device.
The aim is to identify where the connection becomes weak or stops working.
The Extender Connects but Internet Is Slow
Check the internet speed near the main router first.
If the connection is normal there but slow near the extender, the problem may be the extender's wireless backhaul.
Move a repeater closer to the router.
For an outdoor bridge, check alignment and signal quality.
For a wired access point, confirm the Ethernet connection is functioning properly.
Remember that strong signal bars near the extender only indicate the local WiFi connection.
They do not prove that the connection back to the router is healthy.
WiFi Works Outside the Barn but Not Inside
Metal siding or roofing may be weakening the signal.
If the barn already has a reliable network connection, install an access point inside.
If the network does not reach the building at all, evaluate a wireless bridge or professionally installed wired backhaul.
Moving the house router repeatedly is unlikely to overcome a heavily shielded structure.
Outdoor Cameras Disconnect Frequently
Check the camera's supported WiFi frequency band.
Many residential security cameras use 2.4 GHz.
Make sure the appropriate network is enabled.
Next, review the camera's signal quality through its app if that information is available.
If the camera is mounted near the coverage boundary, consider moving the access point closer.
Also inspect the camera's power supply.
An unstable power connection can produce symptoms that resemble WiFi problems.
The Wireless Bridge Disconnects in Bad Weather
Check whether the bridge antennas have moved.
Wind can affect equipment mounted on loose brackets.
Wet foliage may also weaken a link that passes through trees.
Inspect outdoor cable connections for moisture and physical damage.
Review the manufacturer's connection quality indicators.
If the link repeatedly fails during normal weather changes, improve its clearance or consider a more suitable connection method.
Devices Connect to the Wrong Access Point
A phone may remain connected to a distant access point instead of switching to a closer one.
This behavior depends partly on the device and the wireless network configuration.
If your access points use separate network names, connect to the intended network manually.
For coordinated access point systems, review the manufacturer's roaming recommendations.
Using the same network name on several devices does not guarantee seamless roaming.
Nothing Reaches the Distant Building
Check the system one section at a time.
First, confirm that the main router provides internet access.
Next, verify the bridge transmitter's power and network connection.
Then check the receiving bridge unit.
Finally, test the access point inside the destination building.
If the wireless bridge is offline, focus on its power, cables, configuration, and alignment.
If the bridge works but the barn has no WiFi, investigate the local access point instead.
This approach avoids resetting equipment that is already working properly.
FAQ
How far can an outdoor WiFi extender reach on open land?
There is no fixed distance that applies to every outdoor WiFi extender. Usable range depends on antenna design, frequency, obstacles, interference, and the capabilities of the receiving device. A purpose-built directional wireless bridge can connect locations over much greater distances than a conventional outdoor access point can reliably serve ordinary smartphones.
How do I send a strong WiFi signal to a metal barn or outbuilding?
A practical solution is to establish a connection to the barn through a suitable point-to-point wireless bridge or professionally installed wired backhaul. Then install an access point inside the building to provide local WiFi. This avoids relying on the house router's signal to penetrate steel siding and roofing.
Should I mount an outdoor extender inside or outside the building?
Use an outdoor-rated access point outside when you need coverage in a yard or garden. For a metal barn, a local access point inside is usually more useful once the network connection reaches the building. Choose the mounting location according to the intended coverage area and the device's environmental rating.
Do rain and trees significantly weaken long-range WiFi signals?
Dense trees, especially wet foliage, can weaken wireless connections and obstruct the path between outdoor antennas. Ordinary rain is often less significant than vegetation and metal structures for typical 2.4 GHz and 5 GHz WiFi, although the effect depends on the equipment and frequency. Keep outdoor wireless paths as clear as practical and check connections under normal seasonal conditions.
For a large property, the first job is finding where the existing WiFi connection stops being dependable. A patio may need an outdoor access point, while a barn across a field may require a dedicated bridge and its own indoor WiFi.
Choose equipment for the actual distance and obstacles, not just the coverage number on the box. Mount it where the signal path is clear, install power and cabling safely, and test from the camera, desk, doorway, or work area where internet access matters. Those checks will tell you much more about the quality of your setup than signal bars alone.